
How to Restore Old Photos with AI
Learn how to restore old photos with AI, scan fragile prints safely, repair fading and scratches, protect faces, and preserve the original file.
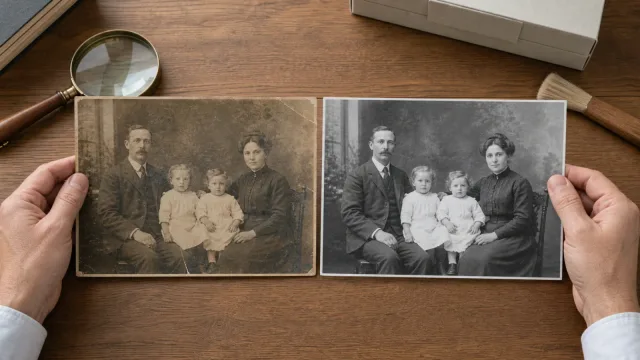
To restore an old photo with AI, first make the best possible scan or camera capture and keep it untouched. Work on a duplicate, correct fading and broad damage before fine scratches, use denoising and face enhancement sparingly, then compare every result with the source. Restore the structure first and colorize only after the monochrome version is approved. AI can make a treasured photograph easier to see, but it cannot prove details that are missing from the print.
Assess the damage before editing
An old photo rarely has just one problem. Dust sits on top of the print; scratches remove part of the image; fading compresses its tonal range; motion blur comes from the original exposure; and a low-quality phone copy adds a new layer of compression. Naming each defect helps you choose a targeted repair instead of asking one aggressive AI pass to rewrite the whole photograph.
| What you see | What it probably is | Best first treatment |
|---|---|---|
| Loose specks visible on the physical print | Surface dust | Handle the print safely and remove only loose dust before capture |
| Pale blacks, weak highlights, or a color cast | Fading or chemical change | Restore overall tone and color balance before local retouching |
| Small white or dark dots and thin lines | Dust, scratches, or minor emulsion loss | Use restrained spot repair after the broad tonal correction |
| A crease or tear crossing a detailed area | Missing or displaced image information | Repair locally and mark uncertain reconstruction for important records |
| Fine random grain or colored speckles | Film, scan, or digital noise | Apply mild denoising without erasing paper, skin, or fabric texture |
| Soft edges or directional trails | Missed focus, camera shake, or subject motion | Try a separate unblur pass only where useful structure remains |
| A tiny but otherwise clean file | Insufficient pixel dimensions | Upscale near the end, after damage and noise are under control |
| A stable black-and-white restoration needs color | Creative or interpretive colorization | Colorize a copy of the approved monochrome restoration |
Also decide what the photograph is for. A small family-album reprint can tolerate different tradeoffs from a genealogy record, museum reference, memorial portrait, or legal document. The more identity-sensitive or historically important the use, the more restrained and transparent the restoration should be.
If the physical object is moldy, wet, stuck to glass, flaking, badly curled, or uniquely valuable, stop before cleaning or flattening it yourself. Digital editing is reversible; damage to the original may not be. The U.S. National Archives advises consulting a photograph conservator when an emulsion is lifting or a significant photograph is badly damaged. Its photograph handling guidance also warns against dusting torn or flaking prints.
Scan or photograph the original safely
The restoration can never be better grounded than its source. A careful new capture often contributes more authentic detail than another enhancement pass on a screenshot.
Prepare the physical print
Clear a dry, uncluttered work surface. Handle the photograph by its edges and support it with two hands. If the surface is stable, loose dust can be moved gently with a clean, soft brush or a hand-operated bulb blower. Do not use canned air, rub the emulsion, peel a picture from an album, or force a curled print flat. Photograph conservators distinguish many historical processes, and a treatment that is harmless for one can damage another.
Choose a flatbed or camera capture
Use a flatbed scanner when the print is flat, stable, and fits fully on the glass. Clean the scanner glass first and preview the frame for dust, clipping, and alignment. Do not close a lid onto a photograph that is oversized, curled, mounted, or fragile. For those cases, place the object on a supported surface and use an overhead camera with the sensor parallel to the print, diffuse even light from both sides, no flash glare, and enough room to include the full edges.
The National Archives recommends a copy stand instead of a flatbed for bound material and warns that automatic-feed scanners can tear fragile originals. Its guide to digitizing family photographs also says to keep the physical original after digitization because digital files can be lost.
Create a preservation master
Capture in color when stains, paper tone, annotations, or faded dyes may matter, even if the image appears monochrome. Avoid scanner sharpening, automatic dust removal, and heavy color correction on the preservation capture; those choices can be tested later on a duplicate. Save the highest-quality, non-interpolated file your device produces. A lossless TIFF is a common master choice, while JPEG or WebP is more convenient for sharing.
There is no single scan setting that suits every print, negative, and output size. Use enough true optical resolution to reproduce the smallest meaningful detail without relying on software interpolation. For formal cultural-heritage work, the FADGI still-image guidelines cover equipment, resolution, color, quality control, and metadata in much greater depth.
Give the master a descriptive filename and record names, approximate date, place, photographer, and information written on the back. Then make a working copy. The National Archives recommends a 3-2-1 backup pattern: three copies, on two kinds of media, with one stored off-site.
Restore an old photo in six steps
1. Preserve and inspect the source
Keep the physical photograph and untouched digital master. View the working copy at normal size and 100% zoom. Note faces, handwriting, uniforms, jewelry, architecture, and other details that must not change. Separate surface dust, fading, scratches, blur, noise, and missing areas before choosing a tool.
2. Correct orientation and broad tone
Straighten the scan and crop only what is clearly outside the intended frame; keep a version with the complete border. Restore black and white points gently, neutralize obvious color casts, and recover midtone contrast. Do not make an old print look like a modern HDR photograph. Its paper texture, film grain, and period lighting are part of the image.
3. Repair dust, scratches, creases, and tears
Open the AI photo restoration tool on a clean working copy. Treat the first result as a candidate, not a replacement for the original. Remove widespread but simple damage first, then inspect large repairs around eyes, hands, lettering, patterned clothing, and straight edges. For a complete example, follow the tutorial on restoring a faded family photograph. Adobe’s old-photo workflow similarly starts from a locked source, makes changes on separate layers, and uses spot healing or cloning for remaining local damage; see its official restoration guide.
4. Reduce noise and blur conservatively
If random grain hides real boundaries, try the photo denoise tool before sharpening or face enhancement. Preserve natural film grain where it carries texture. If a face or object is still softened by motion or focus error, make a separate candidate with the AI unblur tool. One moderate pass is easier to evaluate than several stacked reconstructions.
5. Check identity, then resize only if needed
Compare the candidate directly with the source. Verify face shape, eye spacing, expression, hairline, scars, glasses, handwriting, insignia, and object geometry. Reject a cleaner result if it changes who or what is shown. If you need a larger print or screen image, use the image upscaler only after the restoration is stable, then inspect for repeated texture and invented edges.
6. Approve the monochrome result, colorize, and export
Save the most faithful restored version before adding color. If desired, send a duplicate to the AI photo colorizer, compare likely colors with family knowledge or reference material, and label uncertain color as an interpretation. Export a separate delivery copy for printing or sharing; never overwrite the scan master.
Use a quick repair-order checklist
A predictable sequence makes it easier to see which operation helped and which one introduced an artifact. Start with global changes that affect your ability to judge the whole photograph, move to local damage, and leave generative or size-changing operations until the evidence is stable.
- Preserve the physical original and untouched scan.
- Straighten and establish a restrained tonal baseline.
- Repair broad fading, stains, and uncomplicated background damage.
- Remove isolated dust, scratches, tears, and creases with small local edits.
- Reduce disruptive noise, then address genuine blur if necessary.
- Inspect faces, text, patterns, and historical details against the source.
- Upscale only for a defined output size.
- Save an approved restoration before creating colorized or creative variants.
Avoid trying to erase every mark. A tiny scratch in an empty sky is different from a scratch crossing an eye: the first can often be sampled from nearby pixels, while the second asks software to infer identity-bearing information. Work from the outside of a damaged area inward and use surrounding structure as evidence. If the repair changes from run to run, that variation is a warning that the source does not constrain a single answer.
Non-destructive editing matters even when you use a one-click AI tool. Keep each major candidate as a new file rather than feeding the latest result back into the model. In a layer-based editor, adjustment layers, Smart Filters, masks, and retouching on separate layers preserve the ability to revise or discard a change; Adobe documents these options in its guide to non-destructive editing.
Protect faces and historical details
Faces carry the highest emotional value and often the highest reconstruction risk. When eyes, teeth, or skin are missing or blurred, AI may supply a visually convincing pattern that was never recorded. Judge a restored portrait by resemblance and source support, not by sharpness alone.
This quality-versus-identity tradeoff is documented in face-restoration research. A CVPR 2024 paper on personalized face restoration notes that lifelike, high-quality results can still be unfaithful to the person when the model lacks enough identity context.
Check stable geometry first: face width, jaw and chin shape, distance between the eyes, nose direction, mouth position, and left-right asymmetry. Then check distinctive evidence such as glasses, a gap between teeth, a mole, scar, facial hair, hairstyle, wrinkles, and expression. Texture should remain coherent with the rest of the photograph; pin-sharp irises inside a soft, grainy scene are a warning sign.
Our detailed guide explains why AI photo restoration can change faces and provides a feature-by-feature fidelity checklist. For a beloved family portrait, ask someone who knew the person to compare expression and proportions—not merely choose the most polished version.
Historical objects need the same care. Verify medals, uniforms, signs, dates, license plates, religious symbols, building details, and handwritten notes from the untouched scan or another source. Never use reconstructed text, faces, or objects as the sole evidence for identification, genealogy, journalism, insurance, legal, or academic claims. Keep the edited version clearly labeled.
Restore first and colorize second
Repair structure before adding color. Dust, tears, uneven tone, and blur are easier to evaluate in the original tonal context. Once a monochrome restoration is approved, colorization becomes a separate creative decision; if it goes wrong, the underlying repair remains available.
Black-and-white brightness does not uniquely reveal the original hue. A dress, wall, vehicle, or eye can have several plausible colors with similar grayscale values. Use dated color references, uniforms, surviving objects, written notes, location, and family knowledge where possible. Keep uncertain areas subdued rather than forcing saturated modern color.
Adobe’s restoration workflow also places optional colorization after the restoration and local repair stages. That order is useful because it separates two questions: “Is this shape faithful to the photograph?” and “Is this color historically plausible?” Save the approved monochrome file, the colorized interpretation, and any print-ready version as distinct files.
Validate, export, and preserve the result
Review the image at the size people will actually see it, then at 100% for artifacts. Compare side by side with the untouched source rather than from memory.
- The same people remain recognizable; their expression, pose, and body proportions match the source.
- Eyes, teeth, fingers, hair, clothing patterns, and background objects have not been duplicated or reshaped.
- Repaired scratches do not repeat nearby texture or bend straight lines.
- Skin retains age, natural variation, and a level of detail consistent with the scene.
- Film grain or paper texture is controlled, not replaced by waxy smoothness.
- Text and dates match the source or have been verified independently.
- No bright or dark halos appear around faces, buildings, or clothing.
- The final file looks natural at its intended print or display size.
- The restoration, colorized variant, and delivery copy are labeled separately.
- The physical original and untouched digital master still exist in safe storage.
For export, retain a high-quality restored master with enough data for future work, plus a smaller copy in the format required by the printer, website, or messaging app. Reopen the exported file to confirm its dimensions, orientation, color, and legibility. Store backups in separate places and keep basic metadata with them; a beautiful restoration is not preserved if nobody can identify or open it later.
Most importantly, do not discard the print. Digitization reduces handling and makes sharing safer, but it does not make the physical photograph redundant. The original remains the closest surviving record of what the camera and printing process actually captured.
Frequently asked questions
Can AI fully restore a severely damaged old photo?
Not always. AI can remove many scratches, rebalance fading, and reconstruct small damaged regions when surrounding evidence is strong. A missing face, unreadable writing, or a large torn-away area has no uniquely recoverable answer. Treat those repairs as interpretations, keep the source, and prefer a conservator for a valuable physical object.
What scan resolution should I use for old photographs?
Use enough true optical resolution to capture the smallest meaningful detail for your intended output, without scanner interpolation. A small print generally needs more pixels per inch than a large print, and a negative requires a different setup. If the photograph matters, make one generous lossless master and derive smaller copies from it; formal projects should follow current FADGI guidance.
Should I restore or colorize an old photo first?
Restore first. Correct tone, dust, scratches, tears, noise, and modest blur; approve the most faithful monochrome result; then colorize a duplicate. This separates structural repair from uncertain color choices and gives you a clean version to return to.
Can AI restore a blurry face accurately?
It may improve a mildly soft face when recognizable shapes remain, but it cannot verify details that the source did not record. Compare face geometry, expression, asymmetry, and distinctive features. If the tool produces different faces across attempts, the result is too uncertain to present as recovered fact.
Do I need to keep the original after scanning it?
Yes. Keep both the physical photograph and the untouched digital capture. Digital storage can fail, file formats and devices change, and the edited image may contain interpretation. Preserve multiple backups and use restored copies for routine viewing and sharing.
When should I use a professional photo conservator?
Consult a conservator when the print is moldy, wet, stuck to glass or another photograph, badly curled, flaking, torn through important detail, chemically unstable, or uniquely valuable. Do not scrub, tape, peel, soak, or force it flat before seeking advice.