
How to Restore a Faded Family Photo
Learn how to restore a faded family photo in careful stages while preserving the original scan, meaningful marks, and recognizable faces.
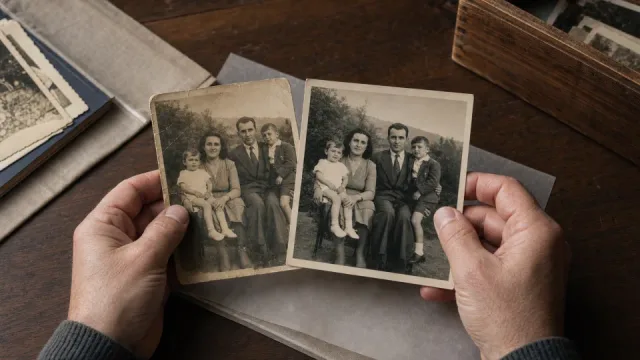
To restore a faded family photo, make it easier to see while keeping its history intact. Small, reviewable changes are safer than a dramatic overhaul, especially around faces, clothing, handwritten notes, and signs of age that may be meaningful to the family.
How to restore a faded family photo without erasing its story
Make an archival copy before you restore anything
The safest first step is a careful scan or capture of the whole photograph, including borders, reverse side, handwriting, and identifying marks when they exist. Store that file as an untouched archival master in more than one location. Perform every digital repair on a duplicate. This distinction protects the original evidence, gives you a reliable comparison point, and lets you revisit a decision later without wondering whether a scratch, stamp, or facial detail was changed by restoration.
Separate damage from details that carry history
Fading, dust, scanner noise, and accidental scratches may make an image harder to read, but not every imperfection should disappear. A studio stamp, date, handwritten note, album edge, or even a period-specific color cast may matter to the family. Ask what people recognize before removing it. List the elements that must remain visible, then make modest adjustments that improve readability without flattening the image into a modern-looking recreation.
Repair in small, reviewable stages
Work through contrast, color balance, dust, scratches, and softness one issue at a time on the duplicate. After each stage, check faces, hands, clothing patterns, and background architecture against the master. Small edits are easier to reverse and make it clear which change helped. If a repair makes a known person look different or turns an uncertain feature into a confident-looking one, reduce it or return to the earlier version.
Keep restoration, sharing, and archival files distinct
Save the archival scan, the restored full-quality version, and any cropped or compressed sharing copies separately. Use filenames that say what each file is and when it was created, then add a brief note about the major restoration choices. This helps relatives and future caretakers understand what they are viewing. It also ensures that a social-media copy does not become the only surviving version of a photograph with family or historical value.
Before you start
- Scan the photograph or negative carefully and store the raw scan in more than one safe location.
- Handle the physical original gently; do not use a digital workflow as a reason to alter the original object.
- Ask family members whether names, clothing, places, or marks in the image have historical value before removing them.
Step-by-step workflow
- Step 1
Create an archival master first
Save the unedited scan with a clear filename and date. Include the front, back, and any notes or borders if they help identify the photograph. This master is the reference you will return to after every restoration decision.
- Step 2
Diagnose fading, damage, and scan issues
Look separately for low contrast, color cast, dust, scratches, noise, and softness. Not every visible mark should be removed: a studio stamp, handwritten date, or edge of an album can be part of the image’s story. Write down what must stay recognizable.
- Step 3
Restore a working copy in modest stages
Use a duplicate for restoration and compare it frequently with the archival master. Check faces, hands, clothing patterns, and background architecture after each stage. If a correction changes a recognizable feature, undo it or keep the less-edited version.
- Step 4
Save restoration and sharing copies separately
Keep the master scan, the restored full-quality copy, and any smaller sharing version as distinct files. Add a brief note describing the restoration date and major changes so future family members understand which version they are viewing.
Check your result
- An untouched archival scan is stored separately from every edited version.
- Faces, clothing, and important historical marks remain recognizable.
- The restored image has clearer contrast without losing its period character.
- A record explains which version is restored and when it was made.
Common mistakes to avoid
- Editing the only scan or discarding the original capture.
- Removing meaningful handwriting, stamps, or traces of the photo’s history.
- Applying dramatic color, contrast, or skin smoothing that changes the people pictured.
Frequently asked questions
What scan quality should I use for a faded family photo?
Use the highest practical quality available from the original photograph or negative, and include the full object when borders, dates, or handwriting may be meaningful. A clean, well-lit capture is better than repeated rescans of a compressed image. Save the unedited file before making any changes. The goal is to preserve a flexible archival reference that can support future restoration, printing, or family research without relying on a single edited delivery copy.
Should I remove every scratch and mark during restoration?
No. Remove or soften damage only when it prevents people from seeing the image, and preserve marks that may be part of its history. Studio labels, handwritten notes, cropped edges, and signs of how a photo was stored can matter to a family. Work on a duplicate and compare it with the archival master often. When in doubt, make a less-edited version rather than permanently hiding a detail you may later want to study.
Is photo restoration the same as photo colorization?
They overlap but have different goals. Restoration aims to improve readability by addressing fading, damage, noise, or balance while preserving the original character. Colorization adds an interpretation when the original was black and white or has lost color information. If you do both, keep the archival scan, the restored black-and-white or neutral version, and the colorized version as separate files. This makes the relationship between evidence and interpretation clear.
Can restoration recover details that are completely missing?
Restoration can sometimes make faint existing information easier to see, but it cannot prove details that are absent or unreadable in the source. Treat any newly smooth or reconstructed-looking feature with care, especially around faces, lettering, documents, and historical objects. Compare with the original scan and other family records when accuracy matters. The aim is a more usable image, not a claim that missing facts have been recovered from the photograph alone.
How should I share a restored family photo?
Share a clearly labeled copy while keeping the archival scan and full-quality restoration safely stored. Include a short caption that identifies people, place, date, and the fact that the image was restored if that information is known. This invites relatives to add corrections or memories without confusing the sharing version with the original object. For especially important photos, share both the unedited scan and the restoration so viewers can see the relationship between them.
Restore a photo
Use the photo restoration tool on a duplicate of your best scan, keeping the archival master separate throughout the process.
Open the toolRelated tutorials
Continue with another practical workflow when your image needs more than one kind of repair or preparation.