
How to Denoise Photos Without Losing Real Detail
Learn how to denoise photos, identify luminance and color noise, protect faces and texture, and review AI noise reduction before exporting natural results.
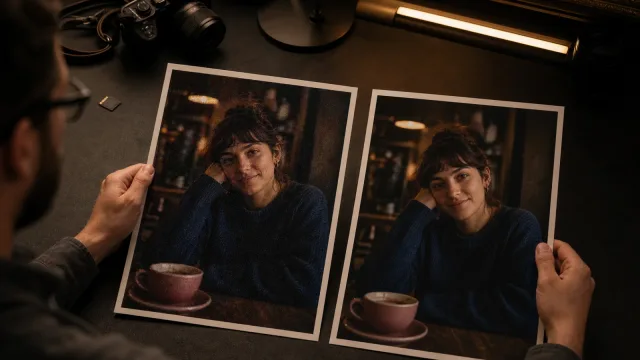
To denoise a photo without losing detail, start from the best original, identify whether the problem is luminance noise, colored speckles, compression, or blur, and apply the lightest noise reduction that makes the image comfortable to view. Compare the result at 100% and at its final display size, protecting real texture in skin, hair, fabric, foliage, and product surfaces.
Identify the noise you actually have
Noise is unwanted random variation, but not every rough-looking area is noise. Correct identification prevents a denoiser from smoothing away useful information.
| What you see | Likely issue | Best first response |
|---|---|---|
| Fine light-and-dark grain, especially in shadows | Luminance noise | Apply restrained luminance noise reduction |
| Red, green, blue, or purple speckles | Color or chroma noise | Target color noise while checking thin colored edges |
| Square blocks and ringing around edges | JPEG compression | Find a better source; denoise can only soften some distraction |
| Smooth bands across a sky or wall | Banding or limited tonal data | Avoid strong smoothing; work from a higher-quality source |
| Directional trails or doubled edges | Motion blur | Denoise visible grain, then evaluate deblurring separately |
| Regular grain in a film scan | Film grain, possibly intentional | Preserve it unless it blocks the subject or intended use |
Adobe’s Camera Raw documentation divides image noise into luminance noise, which appears as grayscale grain, and chroma noise, which appears as colored artifacts. It also notes that high-ISO photos can show more noticeable noise. See Adobe’s official guide to sharpening and noise reduction in Camera Raw.
Inspect flat, midtone, and shadow areas: skies, walls, out-of-focus backgrounds, and skin shadows reveal random noise clearly. Then inspect detailed areas such as eyelashes, hair, fabric weave, leaves, lettering, and product edges. A good result quiets the first group without dissolving the second.
Do not confuse noise with blur. Grain changes from pixel to pixel; blur spreads or weakens edges. If the photo has both, the order matters. The unblur, sharpen, denoise, and upscale comparison provides a symptom-first decision table for mixed problems.
Prepare the photo before denoising
Use the original camera file, full-resolution phone image, or best scan. A screenshot, social download, or repeatedly saved JPEG may contain compression and lost texture that no denoiser can reverse. Preserve the source and work on a copy; keep a raw file if one exists.
Choose the destination before editing. Noise visible at 100% may disappear in a small web card but return in print. Mark several protected details—eyes and hair, printed type and material texture, or foliage and roof tiles—so “natural” has a concrete test.
How to denoise a photo step by step
1. Inspect at normal size and 100% zoom
At the intended size, ask whether noise distracts from the subject. At 100%, identify luminance grain, color speckling, compression, or a mixture. Check one flat and one detailed region, not only the darkest corner.
Adobe recommends previewing noise reduction at least at 100%. Its detail controls show the key tradeoff: retaining more detail can leave more noise, while a cleaner surface can lose detail.
2. Make only the tonal corrections needed for diagnosis
Set enough exposure and white balance to judge the image. Lifting shadows can reveal noise already recorded there; do not crush blacks merely to hide it or brighten far beyond the intended result.
3. Process one clean candidate
Open the AI photo denoiser for reducing grain and color noise and upload the best copy. Treat one pass as a candidate. Repeated passes can simplify skin, hair, small text, and patterns.
4. Compare flat and detailed areas
Switch directly between source and result. Check for calmer skies, walls, and shadows, then confirm that eyelashes, hair, foliage, fabric, and lettering retain irregular real texture.
5. Check edges before sharpening or deblurring
After denoising, reassess the edges. Mild finishing sharpening may help accurate but soft edges. For motion or missed focus, use the separate workflow for unblurring photos safely. Strong sharpening cannot repair a waxy result.
6. Export a master and destination copy
Save a high-quality denoised master and create a separate delivery copy. Reopen that export in its real site, app, or print layout because resizing and compression can change the balance.
Balance noise reduction and real detail
The goal is not a perfectly smooth pixel grid. It is a photograph whose noise no longer competes with the subject. Some residual grain often looks more natural than polished surfaces with missing texture.
Adobe’s manual controls illustrate the central compromises. Higher luminance-detail values can retain more detail but also more noise; lower values can look cleaner while removing detail. More color-detail protection can preserve thin colored edges but leave speckles, while less protection can remove speckles and cause color bleeding. Adobe documents these effects in its Lightroom editing guide.
Judge paired areas: cheek shadow and eyelashes, sky and branches, jacket and stitching, or a smooth product and its printed label.
If the flat area still has mild grain but the important texture remains believable, the balance may already be right. If the noise is gone but skin looks plastic, leaves merge into watercolor patches, stars disappear, or fabric becomes a flat color, reduce the strength or return to the original.
Apply output sharpening only after noise reduction and only for the destination. Sharpening raises edge contrast; it can also make remaining grain more obvious. A restrained, masked sharpen on meaningful edges is safer than a strong global pass.
Adapt the workflow to different photos
- Low-light portraits: Protect eyes, lips, hair, jewelry, clothing, and natural skin variation. Removing colored shadow speckles should not flatten skin tone.
- Night scenes: Check signs, lights, reflections, rain, and haze. Accept real motion instead of turning every figure into a cutout.
- Landscapes and stars: Fine branches, grass, rock, and stars resemble noise. A clean sky is not a success if stars vanish or foliage clumps.
- Products: Preserve wood, metal, textile, condensation, and labels. Reject color bleeding or changed surface texture.
- Old scans: Separate sensor noise from film grain, paper fibers, dust, and scratches. Keep an archival scan and denoise only a labeled copy.
Know what denoising cannot repair
Noise reduction estimates which variations are unwanted and which belong to the subject. When the two occupy the same scale, perfect separation is impossible. Expect limited results when:
- extreme underexposure contains little usable shadow information;
- aggressive JPEG compression has replaced texture with blocks;
- blur, not noise, destroyed the important edges;
- color channels are clipped or broad gradients show banding;
- tiny text, faces, or objects occupy too few pixels;
- previous smoothing has already removed fine detail;
- dust, scratches, hot pixels, or missing areas need targeted repair rather than global denoising.
Adobe’s AI Denoise is designed to reduce noise while retaining fine detail, but its documentation still presents an adjustable intensity and specific supported inputs. That is a useful reminder that denoising is not a universal recovery operation. See Adobe’s official Lightroom Classic Enhance documentation.
Do not use a cleaner image as the only evidence for a face, license plate, document, medical detail, or historical object. Denoising can improve visibility; it cannot prove that an ambiguous pattern represents a particular fact. Keep the source and confirm important information independently.
Use a final quality checklist
Before publishing or downloading, confirm that:
- Noise is less distracting at the intended viewing size.
- Skin retains natural variation and does not look waxy or airbrushed.
- Hair, eyelashes, foliage, fabric, and product texture remain distinct.
- Thin colored edges do not bleed into their surroundings.
- Skies and walls do not contain new blotches, bands, or plastic patches.
- Stars, distant lights, freckles, and other small real features have not vanished.
- Logos, labels, faces, and shapes still match the original.
- Remaining grain is not exaggerated by final sharpening.
- The original, denoised master, and delivery copy are separate files.
- The exported copy looks correct in its actual destination.
Review after a short break if the decision is close. Eyes adapt quickly to a smooth preview, and a fresh comparison often makes lost texture obvious. When two candidates look equally clean at normal size, prefer the one that retains more authentic detail.
Frequently asked questions
What is the difference between luminance noise and color noise?
Luminance noise appears as light-and-dark grain. Color noise appears as colored speckles or stains. They can occur together, especially in shadows, but they affect the image differently and should be reviewed separately around fine texture and thin colored edges.
Does denoising make a photo sharper?
It can make edges easier to see by removing distracting grain, but denoising is not sharpening. Strong reduction may make the photo look softer because it removes high-frequency variation. Reassess after cleanup and apply only a small finishing sharpen if accurate edges need it.
Should I denoise before sharpening?
Usually, yes. Sharpening first can strengthen noise and make it harder to separate from real detail. Reduce disruptive noise moderately, then sharpen meaningful edges for the final output size. Keep the original so you can compare another order when the source is unusual.
Can AI remove all noise from a low-light photo?
It may remove most visible grain, but “all” is not always desirable or possible. Extreme underexposure, compression, and tiny details create ambiguity. Stop when the image reads naturally; do not trade a little residual grain for erased faces, texture, or lettering.
Can denoising fix a blurry photo?
No. It can reveal edges that were hidden by grain, which may make the photo feel clearer, but it does not reverse camera movement or missed focus. After denoising, diagnose any remaining edge smear and use a separate unblur workflow only when needed.