
How to Upscale Images with AI Without Fake Detail
Learn how to upscale images with AI, choose the right pixel size for web or print, and check faces, text, edges, and texture before downloading.
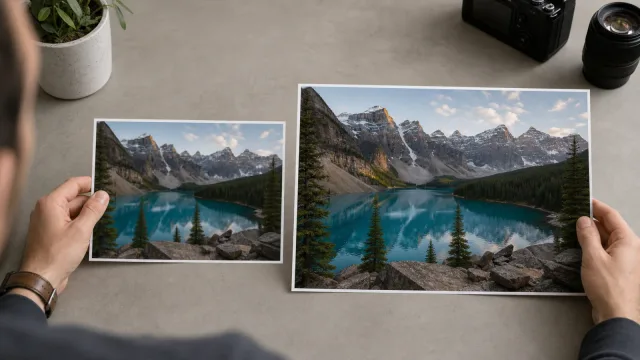
To upscale an image with AI, start with the highest-quality original, define the exact pixel dimensions your destination needs, and choose the smallest enlargement that reaches them. Process one clean copy, then compare it with the source at both 100% zoom and the final viewing size. AI can create smoother edges and plausible texture, but it cannot prove detail that the camera never captured.
Plan the output before you upscale
Do not begin with “make it as large as possible.” Begin with where the image will appear. A 1,200-pixel blog image, a 2× display asset, a marketplace product photo, and an 8 × 10-inch print have different requirements. More pixels than the destination can use increase processing time and file size, and a very large enlargement gives the model more opportunities to invent texture.
Record four things before editing:
- The required width and height in pixels, or the physical print size and requested PPI.
- The aspect ratio or crop the destination expects.
- The details that must remain accurate, such as a face, label, logo, garment, or building edge.
- The real viewing condition: phone card, desktop zoom, close print, or distant poster.
For a responsive website, use the rendered width as the starting point rather than the monitor label. If a layout displays an image at 800 CSS pixels wide and you want a 2× source for dense displays, a 1,600-pixel-wide file is a practical target. Do not turn every asset into “4K” when the layout never displays it at that size.
Preserve the original aspect ratio while enlarging. If the required canvas has a different shape, upscale first and make a deliberate crop afterward. Stretching width and height independently changes faces, circles, products, and typography.
Diagnose the source image
Upscaling solves a pixel-dimension problem. It is not automatically the right first treatment for every image that looks low quality.
| What you see | Main problem | Best first response |
|---|---|---|
| The image is clear at native size but pixelated when enlarged | Too few pixels for the destination | Upscale to the smallest sufficient dimensions |
| Blocks, ringing, or mosquito-like artifacts surround edges | Heavy JPEG compression | Find a better source; otherwise use restrained cleanup before enlargement |
| Edges trail, double, or smear in one direction | Motion blur or camera shake | Evaluate unblurring before the final upscale |
| One depth plane is sharp but the subject is soft | Missed focus | Try a mild unblur with limited expectations |
| Correct edges exist but look slightly weak | Mild softness | Apply light sharpening, often after resizing |
| Colored speckles or grain hide small structures | Image noise | Denoise moderately, then reassess the source |
| A face, logo, or word occupies only a few ambiguous pixels | Missing evidence | Find a larger original; do not trust reconstructed identity or text |
Adobe distinguishes resizing without resampling from changing the number of pixels. Its documentation explains that resampling changes pixel dimensions by adding or removing pixels. That distinction matters: changing only a resolution tag does not create image information, while upscaling does create additional pixels.
Traditional interpolation estimates new color values from nearby pixels. AI upscalers use learned patterns to predict more convincing edges and texture. Even Upscale.media’s own description of the upscaling process describes both approaches as adding or estimating pixel data. Treat the result as a useful reconstruction, not as recovered evidence.
Start from the least-altered file available: the original camera image, full-resolution phone export, original artwork, or best scan. Avoid screenshots, messaging-app copies, thumbnails, and images already enlarged by another tool. Every compression and resampling pass removes or changes clues the next model needs.
How to upscale an image with AI step by step
1. Inspect the original at native size and 100% zoom
Check its pixel dimensions, aspect ratio, format, and visible defects. At native size, decide whether the image is already usable. At 100%, mark reference details: eyes and hair, printed letters, product seams, window frames, foliage, or line art. Keep the source untouched and work on a copy.
2. Calculate the smallest useful target
Divide the target width by the source width and the target height by the source height. Use the larger ratio so both dimensions cover the destination. For example, a 1,200 × 800 source going into a 2,400 × 1,600 slot needs 2× enlargement. If the slot is 2,000 × 2,000, preserve the 3:2 ratio, enlarge enough to cover the square, then crop intentionally.
Choose the nearest available setting that meets the target. A published Let’s Enhance workflow likewise asks users to select a multiplier or exact pixel size before processing. That setting is tool-specific, but the planning rule is general: use the smallest sufficient output instead of the largest button.
For a worked example with a compact source file, see the tutorial on how to upscale a small image without overprocessing it.
3. Correct the dominant defect first
If strong noise, blur, poor exposure, or compression is hiding real edges, correct it moderately before the final enlargement. Use the photo enhancer for broad tonal and clarity problems, the image unblur tool for real motion or focus softness, or the sharpen image tool when accurate edges merely need definition. Do not stack every process by default.
4. Process one clean copy
Open the AI image upscaler, upload the best prepared copy, and choose the nearest useful output. Preserve the composition and aspect ratio. Treat the first result as a candidate, not a replacement for the source. Repeatedly upscaling an already reconstructed result can amplify halos, patterned skin, false hair, and malformed letters.
5. Compare at two viewing sizes
At the final display or print size, ask whether the image now serves its purpose. Then inspect at 100% for changed facial features, broken text, doubled lines, tiled texture, glowing edges, and overly smooth gradients. Compare directly with the original rather than relying on memory. If 2× and 4× both meet the destination, prefer the less aggressive result when it preserves more faithful structure.
6. Export a master and a delivery copy
Save the accepted full-size result as a new master. From that master, make a separate web or print delivery copy with the final dimensions, crop, color space, and compression. Reopen the delivered file in the actual browser, marketplace, design, or print proof. Avoid uploading the delivery copy for another enlargement later; return to the original or master instead.
Understand pixels, resolution, PPI, and DPI
These terms are related, but they are not interchangeable:
- Pixel dimensions are the image’s width and height in pixels, such as 2,400 × 1,600. They determine how much sampled image data the file contains.
- Resolution is often used loosely for pixel dimensions. In a print dialog, it usually means pixel density.
- PPI means pixels per inch in the digital image at a chosen print size.
- DPI means printer dots per inch. A printer can place multiple ink dots to represent one image pixel.
Adobe’s guide to printed image resolution explains that pixel dimensions control the total pixel count, while print resolution controls how densely those pixels are assigned on paper. It also notes that changing print resolution without resampling keeps the amount of image data constant.
Use this planning formula:
required pixels = print inches × target PPI
At 300 PPI, a 6 × 4-inch print needs 1,800 × 1,200 pixels, an 8 × 10-inch print needs 2,400 × 3,000 pixels, and a 12 × 18-inch print needs 3,600 × 5,400 pixels. These are arithmetic targets, not a guarantee of quality. The source, viewing distance, paper, printer, and image content still matter, so follow the print provider’s specification when one is available.
Changing a file’s metadata from 72 to 300 PPI without resampling does not add pixels. It only changes the size at which the existing pixels are assigned on paper. To keep the same physical print size and raise pixel density, you need more pixel dimensions—through a better source, a new scan, or resampling/upscaling.
Also remember that a 2× linear upscale doubles both width and height, so it creates four times as many total pixels. Adobe documents the same relationship for Lightroom Super Resolution: 2× width and 2× height equals 4× the pixel count. This is why file size and memory use can grow quickly.
Choose between upscaling, sharpening, and unblurring
Use the operation that matches the defect:
- Upscale when the image has recognizable structure but too few pixels for the intended screen, crop, or print.
- Sharpen when correct edges already exist and need a restrained contrast boost. Adobe’s resampling options even separate enlargement methods from reduction and hard-edge methods, a reminder that one algorithm does not suit every image.
- Unblur when camera movement, subject movement, or missed focus has smeared or weakened edges. Enlargement alone makes the blur larger.
- Enhance when the main issue is a mixture of exposure, color, compression, noise, and mild softness rather than size alone.
For most photographs, a sensible order is: preserve the original, correct major noise or blur, upscale once, resize or crop for the destination, then apply only the finishing sharpness the output needs. The exact order can vary, so compare one alternative when defects overlap. Our unblur, sharpen, denoise, and upscale comparison gives a symptom-first decision guide.
Do not sharpen a noisy thumbnail before an extreme upscale: the model may interpret the sharpened grain and JPEG rings as real texture. Do not denoise until every surface is flat either, because the upscaler needs genuine edges and irregular detail to guide the result.
Avoid fake detail and review different image types
AI output can look more specific than the source warrants. A pore, eyelash, fabric weave, roof tile, or letter may be visually plausible without matching the original subject. Review the areas where a wrong guess matters most:
- Portraits: Compare eye shape, teeth, hairline, ears, glasses, jewelry, and skin variation. A larger face that looks like another person is not an improvement.
- Text and logos: Check every character against the source or another reliable copy. Reject rewritten prices, labels, dates, signatures, license plates, or brand marks. Never use generated lettering as evidence.
- Products: Protect proportions, seams, controls, surface texture, color boundaries, packaging, and small accessories. False detail can misrepresent what a buyer receives.
- Landscapes and architecture: Look for duplicated leaves, repeated windows, bent railings, invented wires, and crunchy rock or grass patterns.
- Illustration and pixel art: Match the model to the style. A photographic model may add texture that does not belong. For intentionally hard-edged pixel art, a conventional nearest-neighbor enlargement may be more faithful than generative detail.
- Old and archival images: Keep the raw scan. Label the enlarged copy and do not present reconstructed faces, text, insignia, or damage as historical fact.
Extreme enlargement is especially risky when a meaningful feature begins as only a few pixels. The tool has many possible high-resolution patterns that could explain that tiny patch and no way to know which one existed. If accuracy matters, find the original file, rescan at a higher optical resolution, use another frame, or display the image smaller.
Stop when the destination works. The most dramatic before-and-after crop is rarely the safest version for a whole photograph.
Use a final quality checklist
Before downloading, publishing, or printing, confirm that:
- The output dimensions meet a real destination requirement.
- The aspect ratio and intended crop are correct.
- The image looks better at the final viewing size, not only in a zoomed comparison.
- Faces, hands, text, logos, products, and architecture still match the source.
- Hair, skin, fabric, foliage, and other irregular textures do not repeat like a pattern.
- High-contrast boundaries have no bright halos, dark outlines, or jagged steps.
- Smooth skies, walls, and gradients have no bands, blotches, or tiled texture.
- Noise and compression were not converted into false “detail.”
- The export has the expected format, color, transparency, and file size.
- The untouched original, upscaled master, and delivery copy remain separate.
If two candidates pass, choose the smaller or less aggressive one. A technically larger file is not automatically a more accurate or useful image.
Frequently asked questions
Does AI upscaling really improve image quality?
It can improve perceived quality by increasing pixel dimensions, smoothing jagged edges, reducing some artifacts, and reconstructing plausible texture. The benefit depends on the source. It cannot turn missing information into verified detail, and an extreme upscale of a tiny or badly blurred image may look synthetic.
Can I upscale a 1080p image to 4K?
Yes. A 1,920 × 1,080 image enlarged to 3,840 × 2,160 is a 2× increase in each linear dimension and four times the total pixel count. It can fit a 4K canvas, but it does not become equivalent to a scene captured natively at that resolution. Review fine text, faces, and texture before use.
What is the best AI upscale factor?
The smallest factor that meets the destination. If 2× supplies enough pixels, 4× usually adds unnecessary file size and reconstruction risk. Use an exact target when possible, or choose the nearest larger preset and make one final reduction.
Does changing DPI make an image higher quality?
Not by itself. Editing only the DPI or PPI metadata changes the relationship between the existing pixels and print size; it does not add pixels. For a larger print at the same target PPI, you need greater pixel dimensions or a better source.
Should I upscale before or after sharpening?
Correct severe noise or blur first, upscale once, and apply restrained output sharpening last in most photographic workflows. If the source only has mild softness, compare a version with light pre-sharpening, but avoid strengthening JPEG artifacts or noise before enlargement.
Which file format should I use after upscaling?
Keep a high-quality master in a format appropriate to the source and workflow. JPEG is efficient for photographs when saved at high quality, PNG is useful for transparency, text-heavy graphics, and lossless raster stages, and WebP is efficient for web delivery. Follow the destination’s requirements and avoid repeated lossy saves.