
How to Improve Photo Quality Naturally
Learn how to improve photo quality naturally with a repeatable diagnosis, enhancement, and review workflow that protects believable detail.
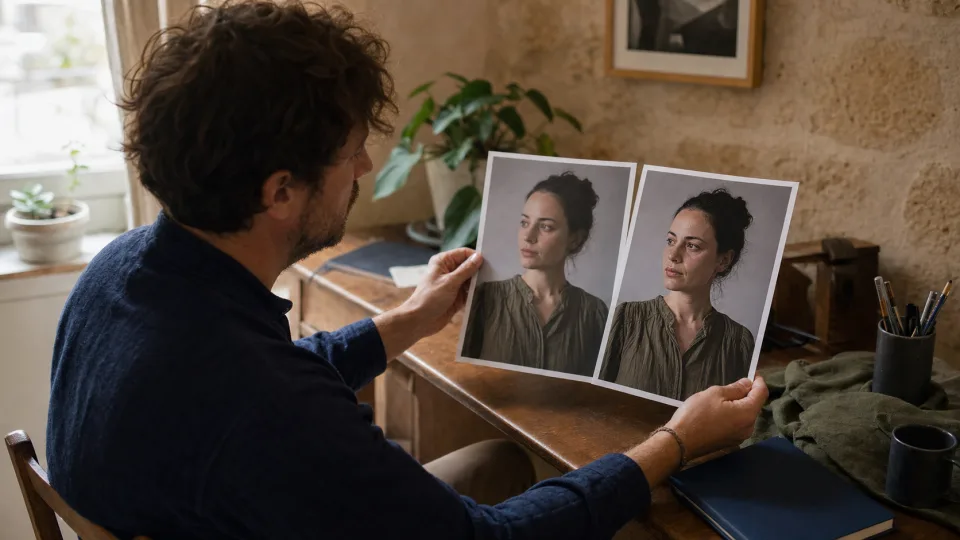
To improve photo quality naturally, first decide what is actually wrong with the image. Work on the largest visible problem first, compare against the original, and stop as soon as the photo is easier to read at its intended size.
How to improve photo quality without losing a natural look
Choose the smallest fix that solves the visible problem
Start by naming the problem you can actually see. A dim photo may need a careful exposure adjustment, a noisy one may need noise reduction, and an undersized one may need a larger copy after cleanup. Applying every available enhancement at once makes it hard to tell what helped and can damage useful texture. A small change that improves readability is usually more valuable than a dramatic result that no longer resembles the original scene.
Protect faces, text, and product details while you work
Pick two or three details that must stay trustworthy before you begin: a person’s eyes, lettering on a sign, the edge of a product, or a recognizable building. Revisit those details after each change. This habit catches waxy skin, invented lettering, halos, and warped edges early. If the tool makes a key detail less believable, return to the prior version instead of trying to repair a heavily processed export with another pass.
Compare at the size your audience will actually see
Extreme zoom is useful for spotting artifacts, but it should not be the only way you judge quality. View the image at phone size, in the presentation, or at the intended print dimensions, then make a brief 100% check around important edges. A version that looks impressive when magnified can look oversharpened in normal use. Conversely, a subtle improvement can be exactly right when the photo is seen in context.
Keep a master and create delivery copies from it
Save the original and the best edited master separately, then make smaller or format-specific copies only when a destination requires them. This preserves a clean point of return if a social platform compresses the image, a client needs a different aspect ratio, or you later decide the enhancement was too strong. Clear names such as “original,” “edited-master,” and “web-copy” prevent accidental reprocessing of a compressed delivery file.
Before you start
- Keep an untouched copy of the original file so every comparison has a reliable reference.
- Decide where the finished photo will appear: a phone, a social post, a presentation, or a print.
- Identify one primary issue—softness, low contrast, noise, a distracting background, or an unsuitable format—before processing.
Step-by-step workflow
- Step 1
Inspect the photo at two sizes
View the image at the size people will normally see, then zoom in on the important subject. A photo can look weak because it is too dark, too soft, or simply too small; each issue needs a different remedy. Note the details that must remain recognizable, such as eyes, product edges, or a face in the background.
- Step 2
Make one purposeful improvement
Use an enhancement workflow for general clarity and balance. If blur is the only problem, use an unblur workflow instead; if the image is undersized, upscale after the cleanup step. Treat the first result as a candidate rather than a final answer, and avoid repeatedly processing the same exported file.
- Step 3
Compare the candidate with the original
Switch between the source and the improved version at normal size. Then examine high-contrast edges, skin, fine fabric, foliage, and shadows. The improved image should retain natural transitions rather than replace them with crisp outlines or smooth, artificial surfaces.
- Step 4
Export a copy for the destination
Keep the best-quality master separate from any delivery copy. Choose a format only after visual work is complete, then open the downloaded file in the app or browser where it will be used. If it communicates clearly there, further adjustment is usually unnecessary.
Check your result
- The main subject is easier to see at the intended viewing size.
- Edges look clearer without bright or dark halos around them.
- Skin, texture, and shadow detail still resemble the original photo.
- The saved output opens correctly in its intended destination.
Common mistakes to avoid
- Stacking several enhancement passes until the image develops artificial texture.
- Judging quality only at extreme zoom instead of at the size people will use.
- Replacing the original rather than saving a clearly named edited copy.
Frequently asked questions
Can AI improve photo quality if the source is blurry?
It can sometimes make a blurry image easier to view, but it cannot verify details that were never captured. Treat an enhanced edge, face, or line of text as a visual aid rather than proof when the source is uncertain. For an important historical, legal, or product detail, compare the result with the original and any other available reference. The safest goal is clearer communication, not the appearance of recovered facts.
Should I enhance a photo before or after upscaling it?
A light cleanup before enlargement is often sensible when noise, poor contrast, or obvious softness distract from the subject. Then upscale once from that best version and check whether the larger file still looks plausible. The right order depends on the source and destination, so keep both candidates and compare them at the final size. Avoid repeatedly alternating enhancement and upscaling, because each pass can compound artificial texture.
Why does an enhanced photo sometimes look artificial?
Artificial-looking results usually come from too much sharpening, smoothing, contrast, or repeated processing. Watch for bright outlines around edges, plastic-looking skin, overly regular hair or foliage, and shadows that lose gradual detail. Lower the strength, make one adjustment at a time, and compare with the original at normal size. If the edited image attracts attention because of the processing rather than the subject, it is usually time to step back.
How do I know when to stop improving a photo?
Stop when the image is clear enough for its actual job: a viewer can recognize the subject, a product is easy to inspect, or the photo reads well in its final layout. Make a final comparison with the original, then close and reopen the exported copy where it will be used. More editing is not automatically more quality. A restrained version that remains believable is easier to reuse and less likely to introduce distracting artifacts.
What file should I save after improving photo quality?
Keep the untouched original, a high-quality edited master, and any compressed or resized delivery copies as separate files. Use a clear naming pattern and avoid editing a file that has already been reduced for email, social media, or a website. This makes later revisions faster and avoids generational quality loss. If you need a different format, export it again from the edited master instead of converting an old delivery version.
Improve a photo
Open the photo enhancer when you have identified a general clarity or balance problem and are ready to compare a new version with the original.
Open the toolRelated tutorials
Continue with another practical workflow when your image needs more than one kind of repair or preparation.